Category: Green Cleaning Tips and Tricks

Maid Brigade Busts Common Green Cleaning Myths 

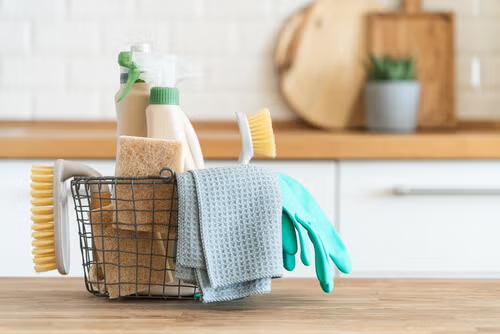
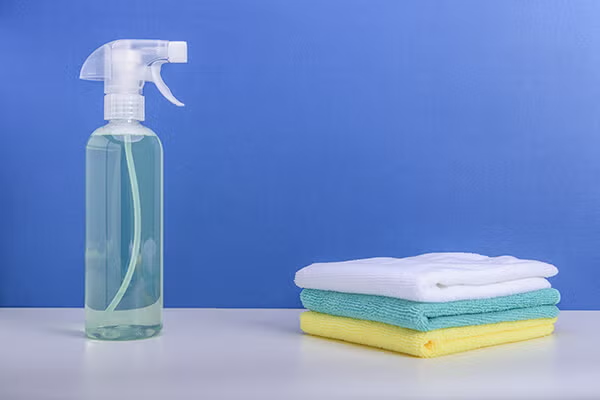
Sustainable packaging. Sustainable lifestyles. Sustainable business practices. It seems as though sustainability and environmental consciousness have been hot topics recently. As the idea of reducing your carbon footprint and adopting more eco-friendly practices has gained momentum, cleaning products and services have also experienced a shift towards safer, greener alternatives. 

But is green cleaning really effective? Can you trust that eco-friendly cleaning solutions are the right choice for your house and your family? At Maid Brigade, we understand the importance of maintaining a clean, healthy home. We’re also passionate about the powerful, non-toxic cleaning and disinfection solutions we provide, which is why we take your concerns about green cleaning seriously. In this article, we’ll address four common myths about green cleaning so you have the knowledge you need to clean or choose a cleaning service with confidence.  

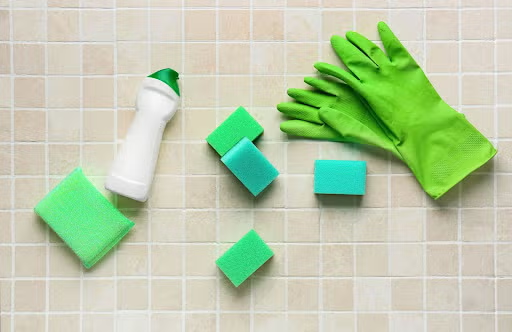
Myth #1: Eco-Friendly Cleaning Products Can’t Cut Through Grime Like Traditional Chemical Cleaners 

Many people believe that products formulated to be safer for the environment are too weak to actually clean the way they’re supposed to, but this simply isn’t true. 

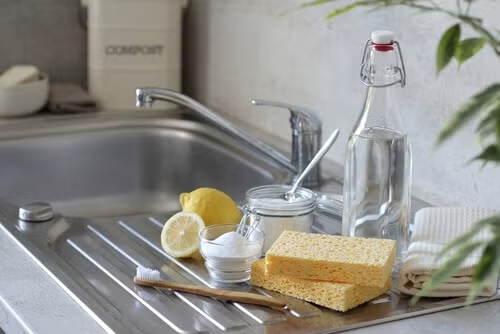
Modern chemistry has formulated countless green cleaning solutions that then undergo rigorous testing and refinement to create an end product that meets and exceeds your cleaning expectations — without harming the environment, of course. Whether it’s plant-based ingredients or naturally occurring cleaning compounds like baking soda, a truly eco-friendly cleaner will deliver exceptional results without compromising your environmental values. 

Fact Check: Green cleaning products are effective, and they’re here to stay. 

Myth #2: Green Doesn’t Mean Safe

A commonly held belief is that green cleaning products are toxic or unsafe. Thankfully, this is incorrect. 

Safe cleaning products are essential to disinfecting and protecting your home, and green cleaning products undergo the same testing as traditional cleaning agents, ensuring quality and safety. Safer Choice and Design for the Environment labels not only certify that the EPA has deemed a cleaning product safe for the environment, but they also signal that the active ingredients used in these products are low toxicity and won’t have a long-term impact on water streams and other environmentally significant areas. 

Think regular cleaning products are always the safe option? Well, think again. Just a quick glance at the safety risks posed by typical chemical cleaners will reveal that they’re often the not-so-safe alternative to their green counterparts. For example, volatile organic compounds (VOCs) found in standard products can add a toxic element to the air around them, and additional organic compounds can irritate your skin and eyes. 

Fact Check: If you’re searching for safe cleaning products, green may be the way to go.  

Myth #3: Green Cleaning is All About Products 

It’s easy to imagine that green cleaning simply means using proven eco-friendly products, and many people do. However, green cleaning is a process more than it is a set of sprays and disinfectants.  

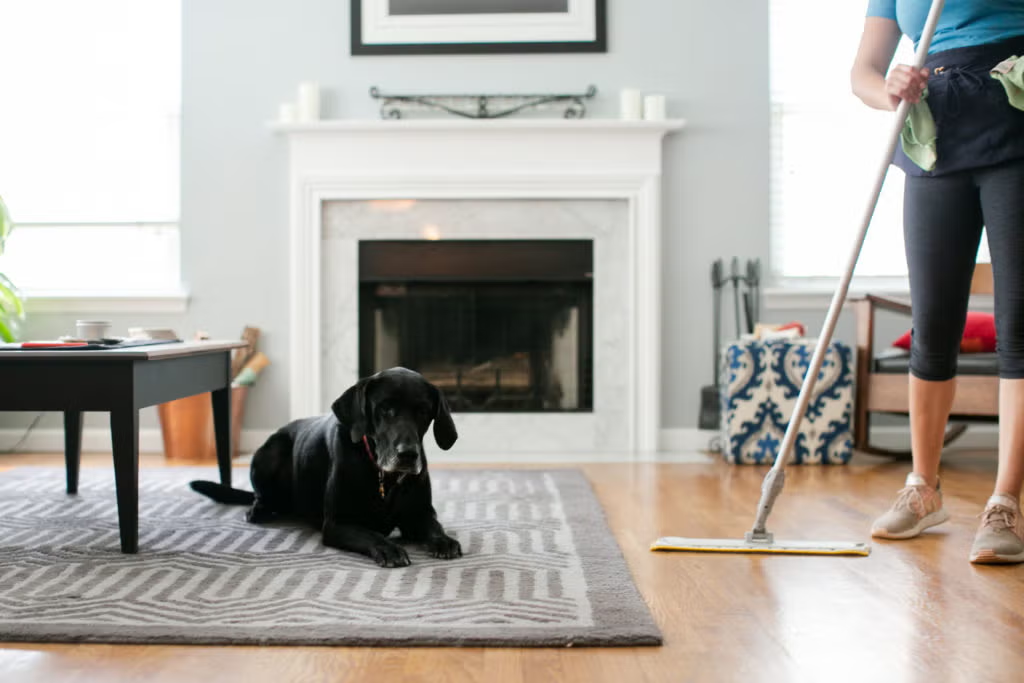
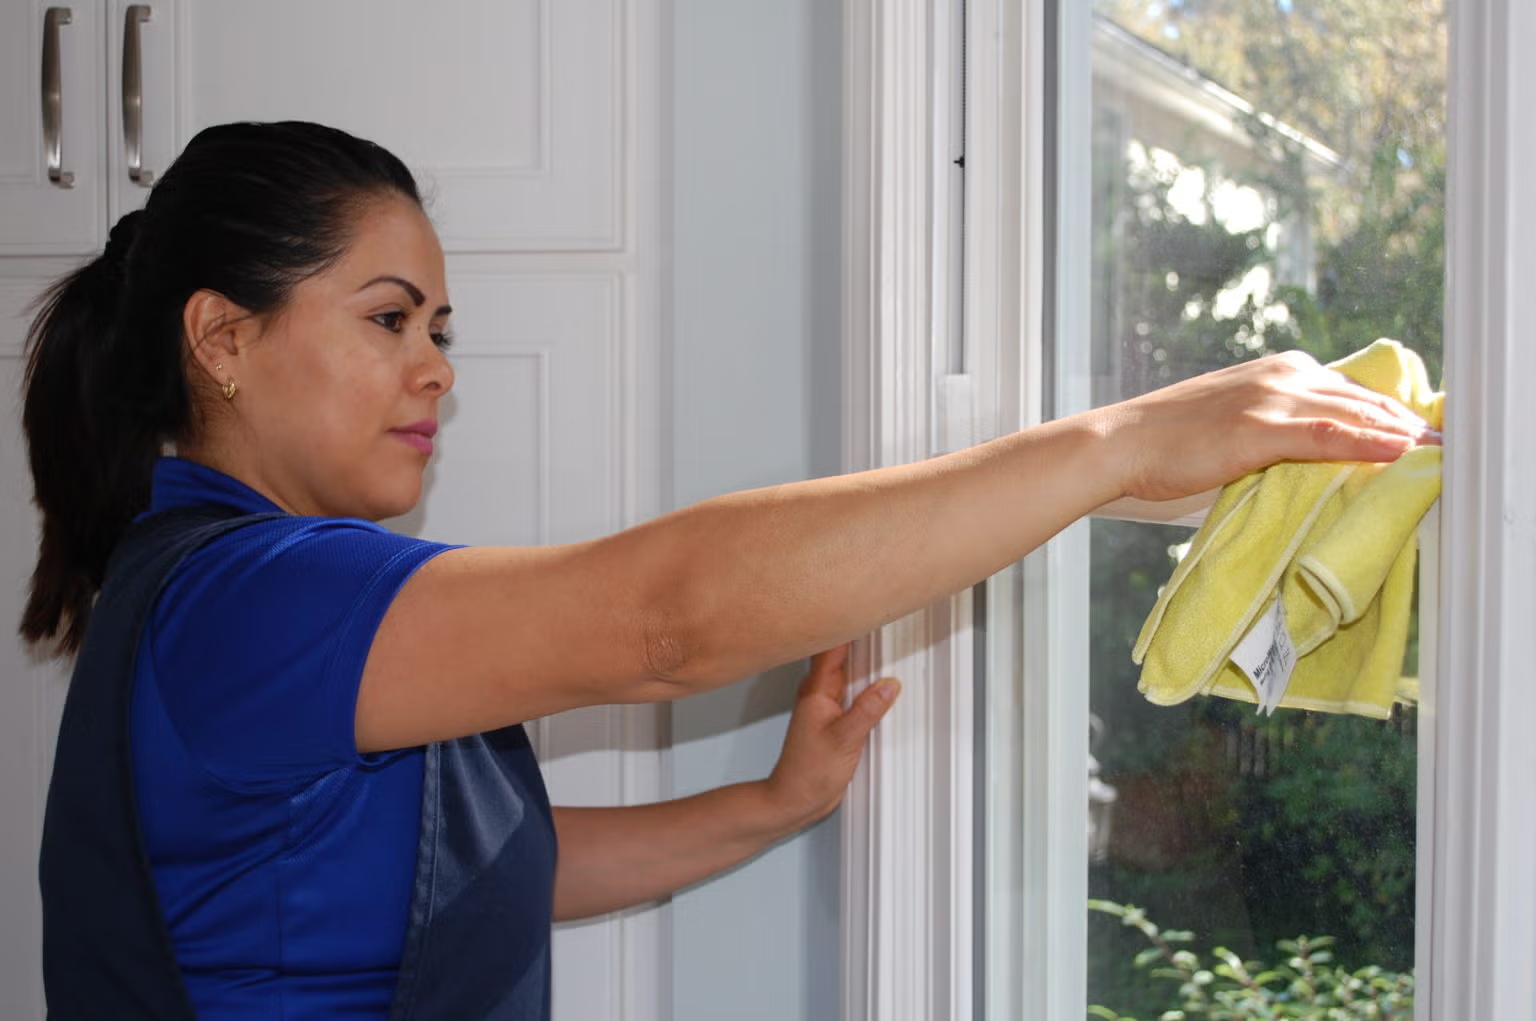
It involves reducing waste, minimizing water usage, and limiting environmental impact by adopting equipment and practices that can be used again and again. The cleaning professionals at Maid Brigade, for instance, use antibacterial cloths rather than paper towels or other disposable products to achieve an eco-conscious clean in every home.   

Fact Check: Products are only the beginning of an intensive, eco-friendly cleaning process. 

Myth #4: Eco-Friendly Cleaning Products Aren’t Really Helping Our Environment  

When it comes to saving the planet, doubters and nay-sayers may believe that green cleaning methods can’t make a difference. Once again, they would be wrong. 

True, some bad actors have been busted for making false claims about the positive environmental impact of their cleaning products, but the standards provided by the Green Guides require companies to provide context and information to support their claims. This can include testing for lower quantities of certain chemical compounds or proving the biodegradability of a cleaning product under “normal” conditions. 

Fact Check: Green cleaning products do what they say: clean up your home and the environment. 

Experience Next-Generation Cleaning with Maid Brigade 

So, eco-friendly cleaning is a great way to disinfect your home and do your part as a resident of planet Earth. We’re glad we could convince you. The next step is experiencing the benefits of this cleaning method for yourself. 

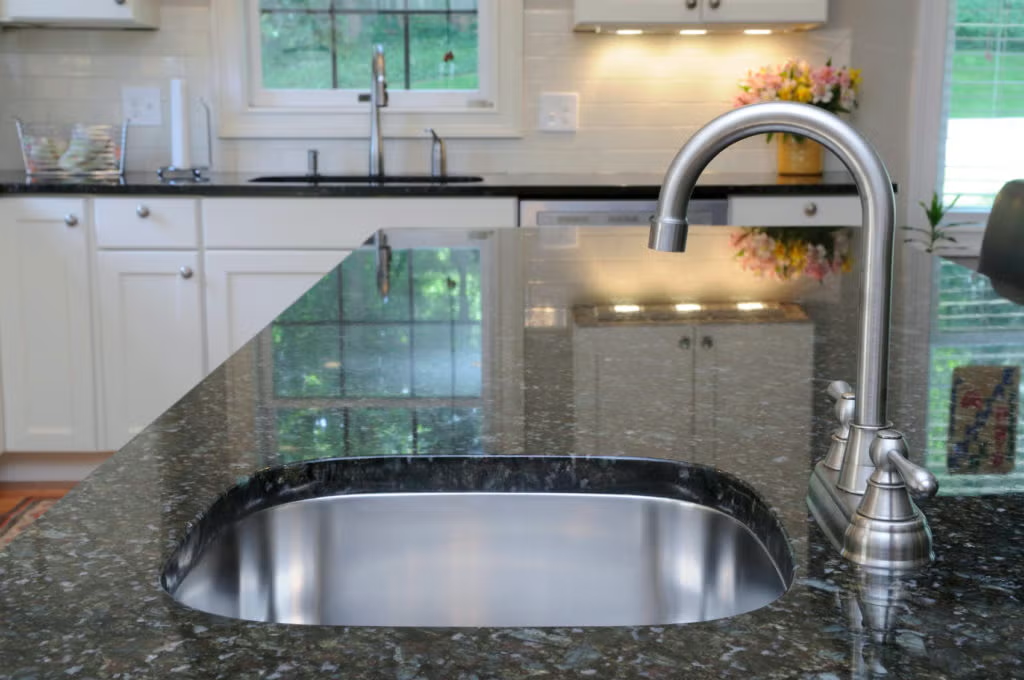
As a green cleaning expert, Maid Brigade is obsessed with eliminating irritants from your home, not introducing new ones. Our disinfection services use only safe cleaning products to rid your home of all things grimy and greasy. Our PURECleaning® process is the healthiest, most advanced green cleaning system available. It’s safe for all your surfaces (including kitchen countertops) and it won’t hurt your plants, pets, or kids. 

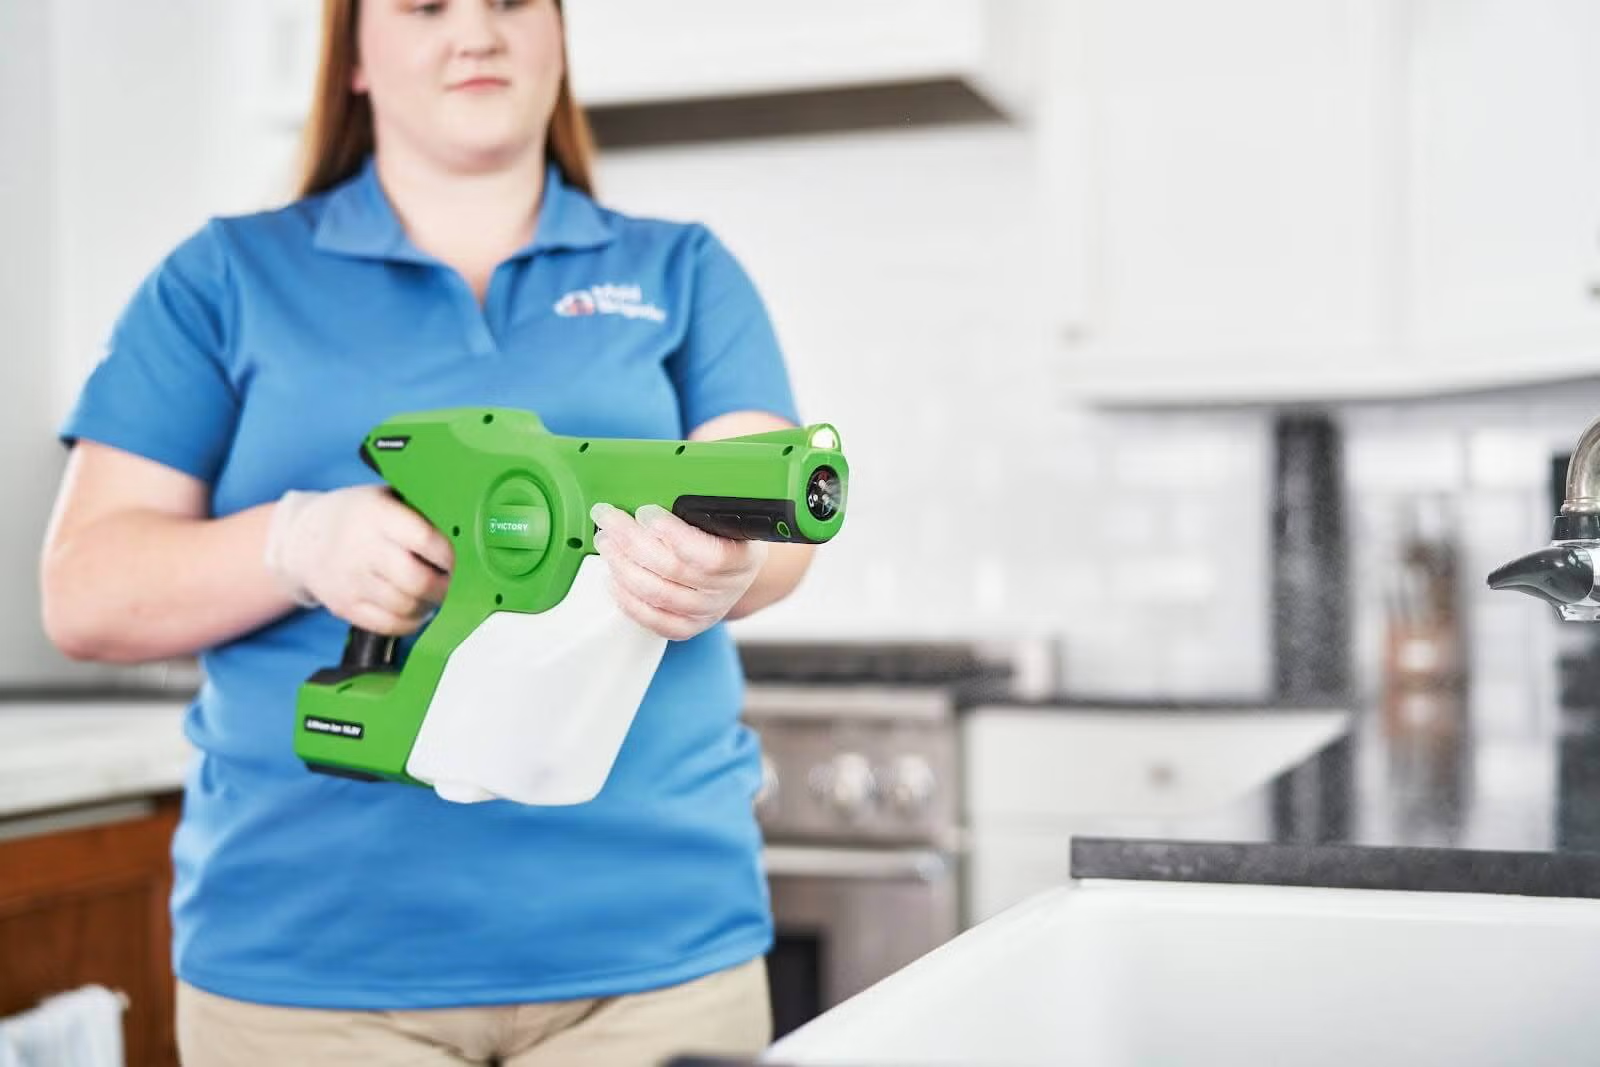
Here’s what PureCleaning® looks like in action: 

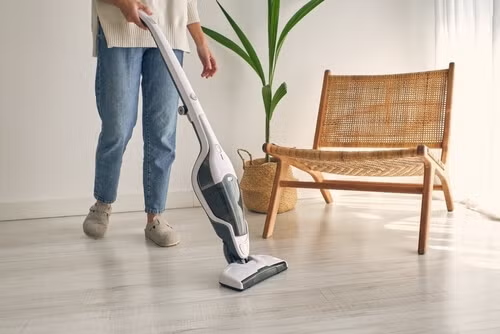
  • Remove Dirt and Debris: Bye-bye, 99.999% of dirt and irritants! Using allergy-free, antibacterial cloths and HEPA-filtration vacuums, we clean your home from top to bottom for 4x better air quality and no cross-contamination between rooms. 
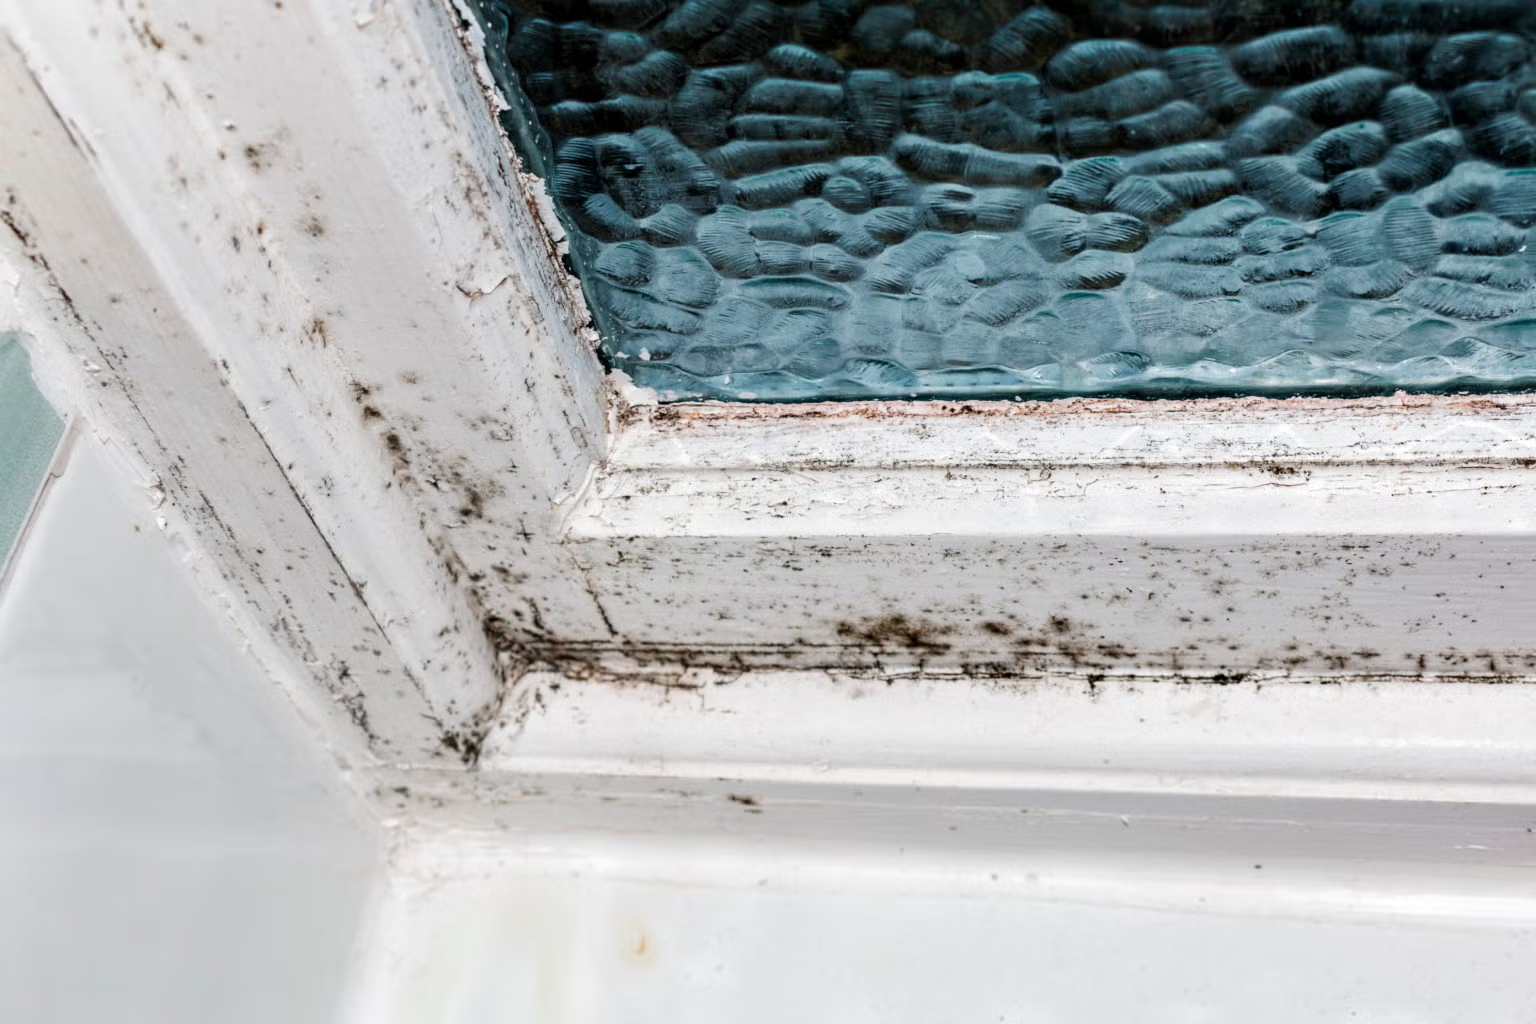
  • Clean and Sanitize: The real secret to PURECleaning® is our electrolyzed water. From mold and mildew to viruses and bacteria, this powerful cleaning solution eliminates them all without leaving behind residues and unpleasant chemical smells. 
  • Disinfect: This is the finishing touch. PUREmist®, our handheld electrostatic sprayer, allows us to apply an aerosolized mist of hypochlorous acid to even the most sensitive surfaces. It’s how we tackle hard-to-reach areas that regular cleanings can’t, and safely disinfect everything from children’s toys to computer keyboards. 

Are you ready for a simple, safe, and effective cleaning that leaves your home sparkling? Contact your local Maid Brigade today to set up your first green cleaning service!

Green Cleaning 101: Why Non-Toxic Solutions Matter for Your Home

Maintaining a clean home isn’t just about aesthetics — it’s about creating a healthy, safe environment for your family. This is where green cleaning comes into play, offering an eco-friendly approach to home cleaning that benefits both your health and the planet. 

At Maid Brigade, we are dedicated to providing top-tier professional cleaning and disinfection services with a strong commitment to eco-friendly practices. Our PUREcleaning system, which utilizes non-toxic solutions like electrolyzed water, is at the forefront of this green-cleaning revolution.

Our goal today is to educate you on the importance of green cleaning, introduce effective techniques, and highlight the many benefits of hiring a house cleaning service that uses non-toxic solutions for your home. By understanding and implementing these practices, you can ensure a safer, healthier living space for your loved ones.

Understanding Green Cleaning

Green cleaning is all about using environmentally friendly products and methods to maintain a clean home. It emphasizes the use of natural, non-toxic ingredients that are safe for both people and the planet. Unlike traditional cleaning methods, which often rely on harsh chemicals, green cleaning focuses on sustainable practices and reducing environmental impact.

Two of the fundamental principles of green cleaning are:

  • Use of Non-Toxic Products: Green cleaning products avoid harmful chemicals like ammonia and bleach, instead using natural ingredients such as vinegar, baking soda, and essential oils.
  • Sustainable Practices: This includes using reusable cleaning tools, reducing water consumption, and proper waste disposal.

The Significance for Home Disinfection and Health

Traditional cleaning methods often involve chemicals that can cause health issues and environmental damage. Green cleaning, on the other hand, promotes a safer approach by using biodegradable and non-toxic products, which are just as effective in maintaining cleanliness.

Non-toxic cleaning is crucial for maintaining a healthy home environment. It helps eliminate germs and bacteria without introducing toxic substances into your living space. This is particularly important for households with children, pets, or individuals with respiratory issues like allergies or asthma.

Benefits of Green Cleaning

Let’s consider some of the key benefits of green cleaning:

  • Health Benefits: Green cleaning reduces your exposure to harmful chemicals. By using non-toxic products, you reduce the risk of chemical burns, skin irritations, and respiratory problems. You also benefit from improved indoor air quality, which can help with respiratory health.
  • Environmental Benefits: Green cleaning products are biodegradable and reduce water and soil pollution. They often come in recyclable packaging to minimize waste as well. You can help contribute to sustainable resource use and the protection of ecosystems by using renewable resources and reducing your reliance on synthetic chemicals.
  • Home Benefits: Non-toxic products are gentle and safe for all surfaces, prolonging the life of your household items and furnishings without sacrificing cleaning effectiveness. Green cleaning products are also less likely to produce overpowering smells like chemical cleaning solutions.

By understanding and prioritizing green cleaning practices, you can create a better, more sustainable home environment. This approach not only protects your family’s health but also contributes to the well-being of our planet.

Key Green Cleaning Techniques

Natural ingredients are the cornerstone of green cleaning. Many common items are effective and safe for various cleaning tasks.

  • Vinegar: Great for cutting through grease and removing mildew.
  • Baking Soda: Excellent for scrubbing surfaces and neutralizing odors.
  • Lemon Juice: Acts as a natural disinfectant with a pleasant scent.

Eco-Friendly Tools

As you bring more environmentally friendly cleaning practices into your life, you’ll also want to make sure you’re using the right tools. For example, microfiber cloths are highly effective at picking up dust and dirt without the need for chemical cleaners. They can be washed and reused many times. Opt for mop heads that can be washed and reused to reduce waste and cost over time.

Proper maintenance of eco-friendly tools ensures their longevity and effectiveness. Wash microfiber cloths regularly to maintain their cleaning power, and follow manufacturer instructions for cleaning and storing reusable mop heads.

Proper Disposal and Recycling

Disposing of cleaning products and materials responsibly is a key aspect of green cleaning. Follow local guidelines for disposing of hazardous materials. Avoid pouring chemicals down the drain. Recycle containers and packaging when possible. 

Choosing the Right Green Cleaning Products

When selecting green cleaning products, it’s essential to be able to decipher product labels to ensure they meet environmental and health standards. Here’s how:

  • Ingredients: Look for clear, transparent ingredient lists. Avoid products with vague terms like “fragrance” or “dye.”
  • Certifications: Seek out certifications such as EPA Safer Choice, Green Seal, and Ecologo. These indicate that the product has been tested and meets rigorous standards for safety and sustainability.
  • Eco-Friendly Claims: Verify claims like “biodegradable,” “non-toxic,” or “plant-based” through reliable sources or certification bodies.

Maid Brigade’s PUREcleaning System

Maid Brigade’s PUREcleaning system represents a leap in green cleaning technology. At its heart is electrolyzed water, produced by combining electricity, water, and salt. This solution is a potent disinfectant, eradicating bacteria and viruses without leaving harmful residues.

This system offers tremendous benefits for homeowners. First, it is non-toxic and safe. Electrolyzed water is safe for families and pets, posing no risks like those associated with conventional cleaners. It also provides more effective cleaning. Electrolyzed water is highly effective against pathogens, ensuring a deep clean without harmful chemicals. Our cleaning process also removes 99.9% of harmful airborne particles, dramatically improving air quality in your home.

The PUREcleaning system employs electrolyzed water throughout the cleaning process. This solution is sprayed on surfaces to disinfect and clean, breaking down bacteria and viruses efficiently. Compared to traditional methods, electrolyzed water offers a safer, greener alternative that maintains high cleaning standards without compromising health or the environment.

By understanding labels and choosing products certified for their safety and effectiveness, and considering systems like Maid Brigade’s PUREcleaning, you can ensure your home is cleaned in a way that is safe, sustainable, and highly effective.

Embrace the Green Cleaning Revolution

Green cleaning is more than a trend; it’s a commitment to a healthier home and a healthier planet. By using non-toxic, eco-friendly products and methods, you can protect your family from harmful chemicals, improve indoor air quality, and contribute to environmental sustainability. We encourage you to adopt green cleaning habits and practices in your daily routine.

If you’re looking for professional cleaning, Maid Brigade uses top-notch green cleaning products and services with our innovative PUREcleaning system. Schedule your service with Maid Brigade today to experience a safer, cleaner home.

Green Cleaning Tips for Your Pet's Bowls & Toys

cleaning for your pets

Your pet’s bowls and toys are probably not on your regular cleaning list, but they should be. Pet bowls, both food bowls and water bowls, build up with food leftovers mixed with your pet’s saliva. This creates the perfect environment for bacteria and microbes.  Vets and other experts actually recommend washing your pet’s food and water bowls daily. Pet toys have saliva that mixes with hair and dirt from floors and make the toys extremely dirty and smelly.  Experts recommend these toys be cleaned weekly.  Let’s look at some tips on how to clean these items:

Safe Cleaning Solutions for Food & Water Bowls

  • Natural Solutions: Never use traditional cleaners to clean either pet bowls or toys.  Our pets are extremely sensitive to the ingredients in cleaning products so avoid them at all costs.  Instead use items like baking soda, vinegar and hydrogen peroxide to clean pet bowls and toys.
  • Dishwasher Safe: If your pet's bowls are dishwasher safe, that is a great option for disinfecting them. Use the hot water rinse cycle and hot air-drying cycle to make sure the bowls are rinsed well and disinfected.
  • Wash By Hand: If washing your pet bowls by hand, use distilled white vinegar as your “soap” and clean with a scrubby sponge by going over the bottom and sides of the bowl.  Rinse the bowls with very hot water and let them air dry.

Safe Cleaning Solutions for Pet Toys

  • Natural Solutions: Hard toys can be soaked in distilled white vinegar to kill bacteria. You can use a stiff toothbrush to clean crevices.  Let the toy soak in the vinegar for 10 to 15 minutes, scrub the surfaces, and then rinse with hot water and let them air dry.
  • Washing Machine: Stuffed pet toys can be placed in the washing machine. Use a mesh laundry bag and place the stuffed toys inside it.  Set the machine on the gentlest cycle so as not to damage the toys.  Instead of using traditional laundry detergent, use a mixture of baking soda and hydrogen peroxide in the soap dispenser.  The baking soda will help lift out the smells and the hydrogen peroxide will work to disinfect the toy.
  • If your pet’s toys are smelling a little funky and you just don’t have the time to put them in the washer, spray them with some distilled white vinegar and place them in a hot dryer. The acid in the vinegar and the heat in the dryer will work to kill the bacteria and get rid of the smells.

Regular cleaning of your pet's bowls and toys is just as important as cleaning our own dishes. After all, they're part of the family!

For more cleaning tips and tricks from our DIY green cleaning expert Leslie Reichert, visit https://www.facebook.com/GreenCleaningCoach/

Professional Cleaning of Laminate Floors

Laminate flooring is popular for being durable and tough to stain. However, it gets dirty just like any other surface. Laminate floors need to be cleaned regularly to prevent scratches or warping. Using unhealthy harsh cleansers can create streaks or damage your flooring. There are many ways to clean green and still achieve quality results. Our experts at Maid Brigade know that laminate floors may need special attention and regular maintenance to keep them looking sparkling clean. Our trusted and trained cleaning experts are here to take care of all your home's surfaces from top to bottom.

Find a Maid Brigade near you today to discuss how we can customize a cleaning for your individual needs. Your local Maid Brigade office can get you started on your personal estimate for your home.

Maintenance Tips for Laminate Flooring

Need a few helpful tips before and in between your scheduled cleanings? Don’t wait for your laminate floor to become dirty or damaged before taking action to maintain them. Consider these preventative measures:

  • Entry mats to help collect moisture, oils, and dirt that tracking from outside. To prevent rugs from slipping, use mat grippers.
  • Use floor protectors to minimize the chances of scratches or scuff marks from chairs, tables, sofas, floor lamps, or other furniture.
  • Frequent sweeping using a floor sweeper or soft-bristle broom can remove most pet hair, dust and dirt that collects on the floor.
  • For hard to reach areas, use the soft brush attachment on your vacuum.
  • Consider the effect of your clothing, too. For example, high heel shoes are not recommended because they can mark and scratch laminate.
  • Treat your dog to a routine mani-pedi. Trimming the nails of your best friend will help preserve the protective layer of your floor.
  • Install window coverings to help reduce the effects of direct sunlight (fading, heat, reflective glare, etc.).

How to Clean Your Coffee Maker

coffee maker

Whether you use a traditional coffee maker or a single cup coffee maker like a Keurig, both need to be cleaned on a regular basis. If your coffee maker is not cleaned, the coffee can start to taste bitter. This can be caused by hard water scaling that builds up inside the water reserve tank and the machine itself.  There can also be caffeine that builds up and creates sludge inside the filter area, the glass pot, and inside the machine.  A Keurig machine has the added problem of water that constantly stays in the reserve tank and throughout the system.  The water is kept warm to give you a quick cup of coffee but it also becomes a breeding ground mold, mildew and bacteria.  This combination can actually make you ill.

CBS did some research on the question; “do coffee makers really make you sick?”  They took swab samples from different single cup coffee makers and found that some had up to ten different types of harmful bacteria in their coffeemakers. These concerns do not mean that you have to stop using your coffee machine.  As long as you follow regular cleaning steps, your coffee maker won't be filled with harmful bacteria, mold & mildew.

How to clean your traditional coffee maker

Fill the water reserve with a 50/50 mixture of cleaning vinegar and water. Let it sit in the reserve for 30 minutes. Plug in the coffee maker and brew a pot of water without a filter.  Let the vinegar mixture stay in the pot for a few minutes to work on the stains in the pot.  Dump out the dirty vinegar water and run a full pot of clean water through the system. Repeat this process one more time.  The acid in the vinegar will work to remove scaling and mildew that has built up inside the machine.  After the machine has had its last rinse, place the filter holder and the pot in the dishwasher on a hot cycle.

How to clean your single cup coffee maker

Similar to your traditional coffee maker, vinegar is a natural cleaning agent for your single cup coffee maker. Fill the water reserve half way with cleaning vinegar. Fill it the rest of the way with water. Run the coffee maker on brew without putting in a coffee pod.  You should continue to brew until all the water in the reserve is gone then place clean water in the reserve and brew without a pod until all the water is gone.  The vinegar will cut through any coffee buildup as well as remove mold and mildew.  Once the rinse cycle is complete, place the plastic reserve container in the bottom drawer of your dishwasher on the hot cycle.  This will completely remove any slimy, scaly buildup.

How often should you clean your coffee maker

It's important that either type of coffee maker is cleaned every month if they're used regularly.  For a traditional coffee pot, you can place the glass pot and filter holder in the dishwasher daily to keep it clean and free from buildup.  The water reserve in a single cup maker can also be placed in the dishwasher on a weekly basis to keep it free from slime and scaling.

Recycling your single use cups

Single serve coffee makers have a bad reputation of filling our landfills with their small, plastic pods. Coffee companies began to realize the harm they were causing and several have taken the necessary steps to find a solution to the problem. Two of the major companies taking part in finding a solution are Keurig and Nespresso. Keurig has stated that by the end of 2020, all of their K-cups will be recyclable. Nespresso has built their own facility dedicated to recycling their coffee pods. We're excited to see environmentally conscious developments in the single cup coffee maker such as this! Brew on!

7 Things You Must Clean Before Moving into Your New Apartment

new living room

Moving into a new apartment can be exciting and daunting at the same time. If you are moving into brand new and previously unoccupied construction, you’ll have to worry about toxic construction dust and dirt; if you’re moving into a space where tenants have already lived, you’ll have a new set of problems, and here are seven areas you just have to clean before you relocate.

Bathroom Exhaust Fan

Of course, you know that the tub, shower, bathroom sink, and the toilet need to be cleaned and disinfected, but don’t ignore the bathroom exhaust fan. It can be full of grimy dust and dirt, and if you take off the protective cover, you might find insect infestation or even mouse droppings, so be sure to pay attention to the ceiling exhaust fan area.

Garbage Disposal

Garbage disposals can quickly become smelly messes, and if the previous tenant has left some food particles in the machine, they can cause your kitchen to smell seriously bad. Make sure that you turn the disposal on, flush it with water, and if a smell still persists, look for the proper products to clean it thoroughly.

Dishwasher

Many people think that dishwashers are self-cleaning because fresh soap is added to them during every wash cycle. Check inside, though, and you’ll find a filter that can be clogged with years of food residue. Some soaps also leave a nasty and clingy scum, so before you load any of your stuff into the dishwasher, make sure it is sanitized and clean.

Refrigerator

We’ve all seen dirty refrigerators, and we all know that bacteria can grow at cold temperatures—just not as rapidly as it grows in the danger zone between 40 and 140 degrees. Check the door gaskets and the glass shelf supports and connectors for hidden dirt and grime.

Cabinets

Your mom probably used shelf paper to line cabinet shelves, and while you may not need to do that, you should remove all of the cabinet shelves and thoroughly clean every square inch of cabinet space. We don’t want to be gross, but insect eggs are hard to detect, and they can lie dormant for a long time.

Door Knobs

Whether you live in a cheap apartment in Chicago or an expensive place in New York City, it’s important to do a bacterial swab test on any area of your apartment and you’ll find huge amounts of growing things on every doorknob. Of course, not all of these bacteria, molds, and viruses will be harmful, but some of these creatures can retreat into spores that lie dormant for months.

Remote

It’s well-known that the TV remote control is one of the dirtiest items you’ll find, and networx.com tells us: “In fact, the remote control in a typical hotel room is considered dirtier than the toilet, sink handles, door handles, and even the infamous bedspread, according to Dr. Charles Gerba in the environmental microbiology department at the University of Arizona.”

The verdict: clean that remote!

We know you understand that you need to start fresh in a new apartment, but pay attention to the seven tips above and take care of the cleaning chores we have mentioned before you move in.

cleaning the floor

Blog Contributor: Abodo.com

Cleaning Stainless Steel from the Inside Out

cleaning the stainless steel in your kitchen

In the late 1960s and into the 70s, the favorite colors for our appliances were earth tones which really meant they were different shades of brown. You would find kitchens with Avocado Green, Harvest Gold or Almond appliances. In the 1980s, black fronted appliances became the rage. The black shiny surfaces were very difficult to keep clean and showed every streak and smear.  Late in the next decade stainless steel started to appear in designer kitchens.  Stainless is a favorite in kitchens even today.

Stainless steel was discovered in 1913 by Harry Brearley of England. It was known as “rust-less” steel. This was the first stainless steel.  Even though stainless steel is rust proof, it is not oxidation proof. When the metals in stainless steel are exposed to oxygen, they oxidize and leave a film or stains that need some special care to remove.  Let’s look at different ways you can clean your stainless steel.

Daily cleaning – One of the easiest ways to keep your stainless steel clean and “print” free is to use a microfiber cloth and water. The best type of microfiber is a very fine woven cloth made especially for cleaning windows.  Start by using a clean microfiber cloth, wet it with water, and wring it out completely. Wipe over the entire appliance and then dry the appliance with a large looped (dry) microfiber cloth.  Your stainless steel will be print, streak, lint, and smear free.

Deeper cleaning – If you have a stainless steel stove, you need to use a gentle degreasing cleaner to remove the grease before following the daily cleaning regimen. A quick DIY recipe for a degreaser is to mix distilled white vinegar with a drop or two of dish detergent and place the mixture in a spray bottle.  Remove the control knobs on the stove by pulling them straight off, then spray with the degreaser. Let it sit for a few minutes, then wipe the area with a damp, large looped microfiber cloth. Once the stove is grease free, follow the daily cleaning method above.

Deepest cleaning – If you find your stainless steel doesn’t look clean after wiping it with a microfiber cloth, you may have oxidation that needs to be removed.  You can use a tablespoon of baking soda mixed with a ¼ teaspoon of olive oil and rub it in the direction of the grain of the stainless steel. You will notice your sponge turning black. That is the corrosion being removed from the stainless steel.  Rinse the cleanser completely from the metal and dry with a microfiber cloth. Once the stainless steel is dry, apply a very light coat of baby oil over the surface of the appliance. This will seal the metal and will temporarily stop the oxidation process.  If the appliance starts looking cloudy or has a film, you can applying more baby oil before going through the entire scrubbing process.

Interior cleaning of stainless steel appliances – When cleaning the inside of any appliance, using little or no cleaner is recommended. Instead, use a microfiber cloth and water which will thoroughly clean the inside of all your appliances.

A tip for the microwave - When cleaning the microwave, you can place a tablespoon of lemon juice into a glass of water and microwave it until it starts to steam (2 to 4 minutes.) Once you see the steam, turn off the microwave and let the steam and lemon juice sit on the walls and floor of the microwave. The acid in the lemon juice will work to loosen food particles inside the microwave. Wipe the entire inside of the microwave with a wet, large looped, microfiber cloth. Make sure to let the interior air dry before closing the door.

For more information from DIY green cleaning expert Leslie Reichert, visit https://www.facebook.com/GreenCleaningCoach/

How to Clean Cast Iron, Wooden Cutting Boards, & More

Cleaning Supplies

After years of trying to clean those “hard to clean” kitchen items, I’ve found that it’s really not the technique but the tools that make the task easier.  Things like cast iron or wooden cutting boards have been around for hundreds of years but just recently technology has caught up to make them easier to clean.  Let’s look at some simple methods of cleaning these hard-to-clean items and then we will look at some new tools that make cleaning them very simple.

Cast iron – One thing to remember when cleaning cast iron is that it is a very porous metal. If you use any type of soap on cast iron, it will absorb it and then leech it back into your food when cooking. One simple way of cleaning your cast iron without soap is to use salt to give it a good scrub. The salt used with a sponge will work to remove any built-up food on the pan. And it will rinse right off the pan and leave it free from chemicals.

A new alternative for cleaning cast iron is a product called CM Scrubber. It’s made of chain mail – which is the same technology used in the Middle Ages to make armor.  This simple chain mail scrubber is made of woven metal links that work to scrub the cast iron without chemicals. All you do is use the metal scrubber on the pan and rinse.  It’s truly amazing how easy it makes it to clean your cast iron pans.

Wooden cutting boards – Wooden cutting boards are also very porous, but research has shown that the wood actually works to kill bacteria left on the wood. This does not mean we don’t have to clean the wood after using it. A simple solution to clean a wooden cutting board is to cut a lemon in half and them dip the open end of the lemon into some table salt. Use the lemon and work the salt over the wood to clean and disinfect the cutting board. The acid in the lemon along with the scrubbing action of the salt will clean the cutting board without using harsh chemicals.

A cool tool to use on the cutting board is called a Skoy Scrubber.  It’s made in Germany and is aggressive enough to scrub the wood without hurting it.  If you use this scrubber you don’t need to use any chemicals to clean the cutting board.

Fine china – If you have very expensive china and don’t trust your dishwasher to clean it without damage, there are some great cloths and sponges that will work to clean them gently and completely. My favorite tool is called a Skoy cloth.  It’s a cross between a paper towel and a sponge.  These cloths are made in Germany, just like the Skoy Scrubs, from a by-product of paper. They are strong, yet gentle and are perfect for washing your fine china.

Expensive crystal – To avoid having film and spots on your fine crystal I recommend washing them by hand. You can use the Skoy cloth and a gentle dish soap to wash them and then rinse with warm water. The best tool to dry the glass is a fine woven microfiber cloth. Don’t let the crystal air dry as that’s where you get spots. Instead rinse and then try right away with the microfiber cloth.

Tall thin vases – You can wash vases in the bottom drawer of a dishwasher but here is always that white film in the bottom of the vase that just won’t come off.  A simple trick it to sprinkle table salt into the bottom and drop in some ice chips. The salt will melt into the ice and turn into a scrubber.  Swish the salt/ice combination around for a few minutes then rinse with hot water.  The salt will scrub away all the film.

keeping kitchen clean

For more information from DIY green cleaning expert Leslie Reichert, visit https://www.facebook.com/GreenCleaningCoach/

Naturally Remove Mold from Window Sills

CleaningWindowSill

Sometimes, windows don’t get the attention they need, especially in the winter. Windows can “sweat’ in the wintertime and the combination of condensation and warm temperatures in a room are the perfect conditions for growing mold and mildew.  Let’s look at some techniques you can use to clean your windows, sills and remove mold and mildew.

Control the humidity in your house   Start by purchasing a hygrometer so you can measure exactly what the humidity levels are in your home. The optimum humidity level in a home should be between 40% and 50%.  In the winter months, you want to keep the levels closer to 40% to prevent condensation on the windows.

Purchase a dehumidifier with an automatic pump   Spend a few extra dollars and buy a dehumidifier with a water pump. These dehumidifiers work day and night, extracting moisture from the air. You can put the drain tube for the dehumidifier into your washing machines drain hose so you never have to worry about emptying the container. These humidifiers come with a hygrometer built in so you can set the levels of humidity for your home and it will work to keep the humidity levels exactly where you want them.

Wipe away condensation   If you find that your windows still have condensation, lower the humidity level of your dehumidifier then wipe the windows with a dry microfiber cloth. Make sure to wipe off the moisture on the glass as well as the window frames and sills.

how-to-clean-and-control-mold

Make your own all-natural mold remover   You can make your own all-natural mold remover by using a spray bottle filled with rubbing alcohol and 10-15 drops of Tea Tree oil. The alcohol will be the carrier and will carry the Tea Tree oil onto the moldy area. The alcohol will then evaporate quickly to prevent more moisture in the area.  The Tea Tree oil will work to kill the mold and mold spores so that the area will be free of mold.  Once the area is treated and left to dry for a day, wipe with a damp microfiber cloth and then spray again with the Tea Tree mixture. This will prevent mold and mildew from growing in the area.

Keep the window sills clean   Cleaning and maintaining window sills on a biweekly schedule will help you be aware if mold or mildew is accumulating on the sills. Just treat with your all-natural mold spray to keep mold and mildew away.

For more information from DIY green cleaning expert Leslie Reichert, visit greencleaningcoach.com

How to Take Care of Hardwood Floors

Taking care of your hardwood floors can be difficult, especially if you are using the wrong cleaning products, mop or vacuum.  Foggy, smeary floors look old and abused, but with a few simple tips and tricks we can have your floors looking shiny and new!

Vacuum often with a canister vacuum - Sand and dust can damage the shine on your hardwood floors. You’ll want to vacuum them as often as you can.  Use a soft, horsehair brush attachment made specifically for hardwood floors.  The gentle brush picks up the dirt without scratching the floor.

Use the correct vacuum - Don’t use an upright vacuum that has a beater bar, as it will scratch the wood. It’s fine to use an upright vacuum if it has a switch that will turn off the beater brush, but the best vacuum to use on a hardwood floor is a canister vacuum. The hardwood floor attachment gently glides of the hardwood floor.

Dry mop the floor - Use a microfiber mop to dry dust your floors in between vacuuming. Dry dusting is a quick way to pick up dust and hair when you don’t have time to vacuum. Use a microfiber mop head that will pick up and hold the dirt.

Washing your hardwood floors - You can use a microfiber mop to wash your hardwood floors. Try my bucket-less mopping technique to have them looking perfect. Bucket-less mopping is a system that uses a microfiber mop and a spray bottle of diluted cleaner. You simply spray the cleaner onto the hardwood floor and wipe it away with the microfiber mop.

Winter time tip - During the winter you’ll want to wipe off any salt that gets onto your hardwood floors immediately, as salt can damage the finish on your hardwood.  Make sure you have plenty of area rugs near the doorways. Should someone come in with salt on their shoes, use a wet towel on the area and wipe off all the salt.

Shoes must come off - Ask your family and guests to remove their shoes when they come into your home. This habit will prevent dirt and dust from scratching the floor.

Use area rugs at entrances to catch dirt before it gets to the hardwood floor. Area rugs will capture dust and dirt at the doorway. There are some great brands of area rugs that are designed to really grab the dirt from the bottoms of shoes as you walk over them. These will remove the maximum amount of grime before walking into the house.

Don’t use straight vinegar to clean your hardwood floor - The acid in the vinegar will damage the finish on your floors. You can use a tablespoon or two of vinegar in a 16-ounce spray bottle but don’t use too much or the acid will work against the finish of the floor.

Consider bringing in an expert if the floor has lost its’ luster. A professional can apply a new coat of finish and recommend other products that will keep it looking its best. He may also recommend having the floor refinished if it’s very damaged.

Protect your floor from sunlight - UV rays can change the color of the wood which may not be obvious until it’s too late.  If you have an area rug, you’ll find that when you remove the rug the wood underneath will be much darker. You can protect the wood with UV filtering blinds or curtains.

Black scuff marks? You can remove black scuff marks with a tennis ball. Just rub the ball over the scuff and it will disappear.

Keep pets nails trimmed at all times - Their claws can really damage hardwood floors.

Try to keep your humidity between 35 and 50% to avoid too much moisture which can warp and damage the wood. You’ll see the wood cup if there’s too much moisture in your home. If the room under the hardwood is damp, make sure you run a dehumidifier to keep the moisture from damaging the floor from underneath.

Removing "Back to School" Stains

For some families, back to school can be a terribly sad day in your household or parents are secretly throwing a “BTS” (back to school) party! It’s officially the end of the summer and the kids are off to school. For younger children especially, the school year brings stains and marks on their clothes. Be prepared to fight each stain with this Back To School Stain Guide.

Before we get into how to battle each different stain they might bring home, lets first get the supplies you will need to have on hand.

  • Hydrogen Peroxide
  • Rubbing Alcohol
  • Oxygen bleach
  • Chlorine bleach
  • White terry hand cloths
  • Iron
  • Bar of white soap (Ivory)
  • Cotton balls
  • Stiff brush
  • Distilled white vinegar
  • Small spray bottle

Markers – Place the stain face down on a white washcloth or a paper towel. Dab the area with a cotton ball dipped in rubbing alcohol. The stain will transfer to the cloth or paper towel. Do not pour the alcohol over the stain as it will bleed into the surrounding fabric.

Crayons – Scrap any excess crayon with a table knife or spoon. Using a hot iron, place a white washcloth over the stain and rub the iron over the area. You should see the stain transfer to the washcloth. Then use a drop of dish detergent and work the soap into the area. Rinse and let the fabric air dry. Repeat the process until the stain is gone.

Water-based glue – Place the stain in very warm water and let the water work to soften the glue. Peel the glue off as it softens.

Super Glue – Super Glue can be removed with an acetone-based nail polish. Place the stain in very warm water to soften the glue. Then using a cotton ball dampened with nail polish, dab the area. The glue should peel right off.

Lead pencil marks – Start by using a pencil eraser and rubbing the stain off the fabric. Then using a gentle liquid dish detergent, place a few drops on the stain and rub it into the fabric. Rinse out the soap and let the item air dry. Continue to repeat the process until the stain is removed.

Grass - Mix up a solution of one part distilled white vinegar and two parts water. Put it into a spray bottle. Spray the grass stain with the mixture and let it sit for 15 minutes. Using a stiff brush, rub the area until the stain is loosened and starting to come out of the fabric. Rinse the area and repeat by spraying and scrubbing until the stain is gone.

Salad dressing – Start by blotting the greasy stain with rubbing alcohol on a cotton ball. Soak the entire area and let it sit for a few minutes. Using a bar of white soap on the area, rub it until it creates a lather. Rinse the soap and alcohol out of the fabric and let it air dry. If the stain persists repeat the process until it disappears.

Chocolate milk – Start by running cool water through the back of the stain. This may remove most if not all of the chocolate milk. Then mix up a paste of powdered oxygen bleach and water and rub it into the area. Let it sit for a few minutes and then rinse the fabric. Wash normally and let the item air dry. Repeat the process until the stain is removed.

Ballpoint pen – Treat the area with a cotton ball dipped in nail polish. The pen mark will disappear.

Microfiber Cloth Cleaning Hacks

Microfiber was developed in Japan during the 70’s for swimwear. Ten years later, European scientists found that it was the perfect fabric for cleaning due to its absorbency.  By the early 2000s, the microfiber industry had exploded.  Even though microfiber has been around for decades, there are many who have yet to try cleaning with microfiber tools. Take a look at all you can do with microfiber – it’s worth the investment!

Perfect windows – There are many different types of microfiber cleaning cloths. For windows, use a fine woven microfiber. It almost looks silky.  The microfibers are very small and will leave windows perfectly clean. Dunk the cloth into hot water and wring it out well so it’s damp. Wipe it over the glass and then watch as it picks up dirt then dries perfectly without streaks or smears. Or spray the glass with water and use a dry microfiber cloth as if it’s a paper towel. Dry the glass completely and it will be free of streaks, smears and lint.

Save on paper towels – Use microfiber cloths in place of paper towels when cleaning. Microfiber is more absorbent than paper towels and better for the environment since they are reusable. Be sure to launder microfiber cloths, towels and mop heads with only other microfiber materials.

Chemical free dusting – Most spray dusting polishes leave layers of silicone on furniture. Instead, use a dry microfiber cloth to dust your furniture. Microfiber has tiny fibers that hold onto dust. It will hold onto dust and dirt particles until laundered which makes dusting much faster.

Preventing cross-contamination – Hospitals have used microfiber mops for years to prevent cross-contamination. You can use in your home for the same reason! Microfiber mops have a cover that attaches with Velcro onto the end of the mop. Once it’s dirty it can be removed and laundered. It’s like using a brand-new mop every time you clean.  No more smelly, moldy mops!

Large outdoor windows – Homeowners may struggle keeping large windows clean from salt, pollen and other outdoor elements. A damp microfiber cloth wiped over large windows will remove any salt or pollen and leave the windows looking crystal-clear.

Dusting walls – Instead of washing the walls in your home, try dusting them instead. Use a microfiber mop with a dry mop head and dust your walls in minutes. The microfiber will pick up the dust without dealing with a bucket and rag.

Ceiling fans – Have you looked at the paddles of your ceiling fan lately? Dust them quickly with a large-looped microfiber cloth. Using the dry cloth, wipe it gently over the fan paddles to pick up and remove dust. This task will takes minutes and leaves the fan dust free.

Perfect granite – If you have dark granite counter tops, you may struggle with streaks and smears from cleaning. Try using a microfiber cloth designed for glass.  Dampen the cloth and wipe over the granite to leave it looking showroom perfect!

To read more from Leslie about cleaning with microfiber, check out this blog:

https://maidbrigade.com/blog/microfiber-for-cleaning/